I love the idea of displaying your favourite pieces of fabric in your home as cushion covers, curtains and as wall art. A simple (and inexpensive) way of doing this is by using wooden embroidery hoops. These can be found in places like Spotlight and Lincraft, but more cheaply on Ebay.
Here is an example of embroidery hoop wall art I found over at ohdeedoh. I love the quirky combination of fabrics and the way they frame the mirror.
After being inspired, I decided to try and make my own embroidery hoop wall art as a gift for a friend's birthday and thought a little tutorial might help to illustrate just how easy it is.
Materials:
- embroidery hoop, any size you like
- cute fabric
- fabric fray stop (optional)
First, take the inside ring of your embroidery hoop and place it over the area you would like to feature in your frame.
Cut around it generously. I used a rotary cutter and left about 1 inch. this enables you to stretch it more easily and get it into the exact position you want.
 |
| place inside ring on fabric, cut around it generously |
Put the fabric over the inside ring and pop the outside hoop on top. Position the fabric and tighten the knob until the fabric is taut between the two rings. You will probably need to pull it at various points around the ring to smooth out some of the 'bubbles' that appear.
 |
| stretch the fabric taught with your fingers |
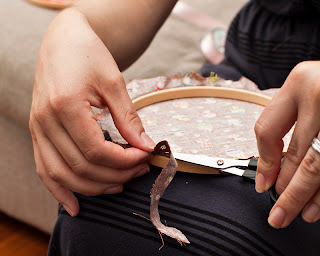
When you're happy with it, trim the excess fabric from the ring close to the hoop edge. At this point, I also ran some fabric fray stop over the fabric edge, but I guess you could also use some thin tape to cover it up.
 |
| trim fabric close to the edge |
Attach a piece of ribbon or twine at the top for hanging and you're done!
You can customise them for anyone's taste which is nice. My friend likes all things cute and Japanese. I hope she likes them!
 |
| embroidery hoop wall art ready to hang! |


