Stocking fillers- pleated headbands

Headbands are so cute and versatile. I wore one constantly when I was on holiday in Thailand and Cambodia as they keep your hair off your head in the humidity and hide unsightly unwashed hair. Awesome. I think they would make cute and customisable stocking fillers for Christmas too.

Before recently I had only ever made a couple of headbands in my time and they have been mostly for babies like this one:


I wrote a short tutorial for making a yo yo flower headband if you'd like to have a go at this one. So quick an easy!

In the lead up to my first market stall I was making lots of cosmetic bags in sweet vintage inspired fabrics and realised those same prints would look really cute as a headband. So I enlisted the help of the "google brothers" to find a suitable tutorial. There were heaps out there but my favourite was this pleated headband tutorial by Jess from Craftiness is not Optional (awesome blog by the way, check it out!).

It was super easy and they were really fun to make. Here are some pics:


Pleated headbands


You could whip up a bunch really easily and make them Christmassy with the right fabric and add ons like mini white pom poms, buttons or even silver bells! Cute.

Fun little stocking fillers! Yay.


Find me on Facebook!


In preparing for my first market stall I decided it would be a good idea to start a Facebook page as another way to connect with friends and fellow crafty people.

Since starting the page I have enjoyed sharing my sewing adventures with friends who may not get to see this blog too often and have found it to be a good way to meet more local designers and creators. It opens up a whole new way of being inspired and sharing the love of creating!

If you would like to pop by my facebook page to say hello you can find me at Elegantpaws Designs. (This is my crafty business alter-ego. Cat related, of course.)

See you there!

1st Market stall wrap up

Well, I made it! After many hours sewing, organising, planning, spending and stressing, I arrived at my first market stall armed with a table full of goods and a huge sense of accomplishment. Really, I can't remember the last time I put this much effort into anything so I was happy to have made it in one piece with my sanity (mostly) in tact.

The weather conditions were not optimal- cold, miserable and rainy, but as the market stall was held indoors at St Michael's Primary School, we were well sheltered from the elements.

I arrived at the gate to be greeted by a group of parent helpers and strong kids who took my table and boxes and carried them inside for me.I could hear a seasoned marketeer (my fun invented word) telling her pal she wished she had this kind of help every time she worked a market.... a luxury no doubt!

I set up carefully laying out my tablecloths (pre pressed) and pinning on my bunting. I put out the boxes of pencil cases and make up bags and placed all my signs in their right spots. Then I changed into my dress and put one of my headbands on to show what they look like.

While this was all happening, experienced marketeers busily attended their stalls and wares, setting up and getting organised. As I looked around I felt a little nervous and out of place with my small table of goods, but before I could psych myself out, I took a deep breath and reminded myself I really had done all that I could.

Karl arrived shortly afterwards, bought me a glass of champagne and took some photos:


Market stall table set up


logo in frame


table shot of things for sale


coin purses, headbands and make up bags


framed logo and make up bags


cute hair accessories by a colleague, 'Love Willow'


pleated headbands


wearing a pleated headband

All together I sold 18 of my pieces and lots of hair accessories by my colleague Kristin. I was really happy with that for a first go. The most popular items were the pencil cases and coin purses in the prints for kids. I didn't sell any of my make up bags or cushions but those kinds of adult gifts may do better at a different market. I might put some thought into streaming products for kids and adults and maybe keep them separate. Does anyone have any thoughts on this?

Overall I am really glad I took the leap and booked myself on the market stall. It forced me to think seriously about doing the work as a 'job' and gave me an insight into the process right from daydream to market stall. I know now that I am capable of doing it and I have a good lot of stock which can form the basis of a possible future collection if I'd like to try it again sometime.

Watch this space!

First market stall - what I have learned so far

I have been super quiet on my blog in the last few weeks as I prepare for my first market stall coming up in 1 week + 1 day. I have learned a lot from the process and thought I'd reveal some of these things in order to perhaps help anyone else there thinking they're ready to have their own stall:


Things I have learned in preparing for my first market stall
  1. Yes, booking yourself in for a market stall in 1.5 months will be a good motivator to get organised. However.....
  2.  1.5 months is nowhere near as long as you think.... or enough time to build stock from scratch
  3.  Faffing around making a logo for 3 weeks is not encouraged and should be considered before you even book a market stall
  4.  Cutting fabric and ironing on interfacing will be the bane of your existence and takes 3 times longer than you expect it to
  5. Deciding to do a market stall during a time when you have two away trips for work is not advised
  6. Drinking wine while sewing at night is not a winning combination
  7. Buying every pink piece of fabric you're attracted to will result in a very pink market stall, leaving you scrambling one week out to make things in blues, greens and purples
  8. organising business cards and paper bags for your goods in advance will help you to stress less.
Ok so during this whole process I have taken things pretty much in my stride and things have been going pretty well. That is until I realised last night just how much pink I have in the collection and not a lot else. Eeep!

I have a little time left and some ideas, along with the support of my amazing husband who even offered to iron on interfacing for me which is so sweet (he has no idea how dull it is...).

So I better get back to it, here's some pics so you can see where I'm at so far (pink land, apparently!) Thanks go of course to Karl for taking pics and making my things look pretty!

cosmetic bags


vinyl covered coin purses


14" cushions


So that's most of what I have so far. I also have a few pencil cases and I'm trialling some headbands at the moment. Hopefully I can get everything done in time!

wish me luck!

Pencil cases/make up bags

Today I'm writing this post while away in Western Australia for work. With the market stall coming up in two weeks (argh!) the week long trip away wasn't exactly the best timing, however I have made good use of my spare time by spending 2 hours fusing interfacing to 17 sets of purse pieces. Now they're all ready to sew up when I get home. I love that the boring part is now out of the way and I get to sew! Hee hee.

Before I left I made some prototypes of the purse styles I'd like to make for the market and cut lots of fabric. I made a couple of pencil cases which could also be used as make up bags using elephant printed fabric I bought on my trip to Thailand. I also made one using some of my favourite kokka fabric which has framed ballerinas and cute Paris icons like the eiffel tower and arc de triumph.

Here is a pic of the front:


I'm pretty happy with this part but not as happy with the back. I thought it would be sweet to include one of the Paris icons on the back of the case. I found some sweet little heart eyelet lace and put r together. All was fine until I boxed the corners of the case and lost the bottom part of the eiffel tower. :(


Oh well, it was a fun experiment and I still love it overall. Ah the perils of experimental sewing! Fun.


Paris fabric cushions

I visited Paris over Christmas time about 8 years ago and simply loved the city. It's everything you dream it would be plus a magic you weren't counting on. There's a reason the cliche about falling in love in Paris exists, but no-one tells you the love you have is for the city itself. :)

Anyhoo luckily for me you can find all sorts of accessories and home wares to put a little bit of Par-ee into your life and there's plenty of French themed fabric out there too.

One of my favourites is a lovely Eiffel Tower fabric from Michael Miller. A while ago I used the red printed fabric to make some cushions for friends who really liked them. I decided to buy some more in red and black to make little cushions to sell at the market stall I have coming up at the end of the month. I backed each cushion with a plain black polka dot. Here's a pic:

Eiffel Tower fabric cushions

So far I have made 5 black and have cut fabric for 4 red cushions. If you'd like to make your own, I followed this great little video tutorial from Brett Bara's website the Manhattan Craft room. It was pretty easy and cushions would make nice gifts for Christmas I think. Brett also has a nice little book called 'Sewing in a straight line' which I'd like to check out too.

What French themed home wares do you have?

a handmade Christmas- fabric coasters

I love the idea of only giving handmade presents for Christmas. Sewing gifts is one of my favourite things to do and seems to dominate this blog. I hardly have anything I've sewn for myself! Instead I have lots of pics and memories of people enjoying the things I've made them so that's pretty nice. :)

Anyway, this year I'm not sure I'll have time to make everyone something, however if the little market stall I'm preparing for isn't a roaring success I should have some things left to give to family and friends. Sweet!

One thing I'd like to make alongside cushion covers and wall hangings are sets of quilted coasters. I have seen some gorgeous ones out there and they seem pretty easy to make. With my growing obsession with fabrics it also provides an opportunity to use all those pretty pieces in a lovely way.

I got the idea for making fabric coasters from Amy of Nana Company. She makes the most amazing patchwork and embroidered things, they're so beautiful. Check out her blog for pics and pretty things to buy.

Amy has made some lovely eating mats and coasters using pretty combinations of fabrics, patchwork and embroidery. Sigh, if only I was this talented!

Here are some mats and coasters I like best from Amy:


I love the floral prints and the complimentary ric rac detail. So sweet! I doubt I could make some as nice as these but they provide a good source of inspiration!

Here are some more cute coasters by Anna from Noodlehead. I like the quilting detail on these and the lovely fabric combinations. Recently I bought one of Anna's runaround bag pattern that i'm looking forward to sewing up. Check out her blog if you haven't already, she has free tutorials and lots of inspiration to enjoy!


 So I think I'm ready to give it a go, the hard part will be choosing which fabrics to go for first.

 Thanks for the inspiration ladies!


xx

Universal craft blog directory- CraftyRie

Through twitter today I found a link to a lovely post by fellow Aussie Rie. She has started up a big craft blog directory for crafty people to share their blog and spread the love of creating around. I thought it was a great idea as I'm always keen to check out new blogs and now they'll be a convenient place to do this!

I'm going to add my blog to the list and if you have a crafty blog (ie make things create things or buy lots of crafty thing!) you can add yours too! Just click on the link below or find it in my side bar.

CraftyRie

Happy craft-sharing!

My first market stall - what to make?

I have been talking about having a little market stall for, I don't know, almost a year now I think. I am great at having 'ideas' for things then never actually doing anything about them. This is how this blog came about in the first place- it was an attempt to keep me accountable. Seems it's worked, because as the one year anniversary of my blog looms (!) I've decided to book myself a stall at a little market and just get myself there.  

The little market is on at the end of November and is being held at a little primary school as a 'mum's night out'. it's an opportunity for mums to buy Christmas presents, stocking fillers and whatever else takes their fancy.

In order to fit in with this I have to decide what to make because at this stage I don't have one thing I would be happy selling. So.... lots of work to do. Nothing like a deadline to get you motivated!


Image from FPTFY

 The market organiser wanted some homewares and general 'funky and fun stuff''.  I have had a look through some things I've made in the past and have come up with a few ideas for a collection: 

Little zipped coin purses in cute fabrics


Clutches in gorgeous vintage style fabrics


Tote bags in a variety of styles


Sweet little hair ties and headbands


Cushions and covers in a variety of styles 


Embroidery hoops with lovely fabrics


I think I'll see how I go with these to start with, however I might also like to include some sunglasses cases, little drawstring pouches and make up bags. I guess I'll have to see what it looks like as the collection starts then go from there.

On top of that I'm trying to finalise a logo to use on tags, business cards and other promotional things in case anyone wants to follow the markets up with future purchases. There's also the stall display, carry bags and storage to consider too....

I think I've put myself in a good position for selling things for the first time- it's a low pressure environment and if I don't sell anything/much I have a whole lot of lovely things to give to friends and family at Christmas time. 

Safest option yet..... :)

Any suggestions or hints & tips for my first market stall would be greatly appreciated!  


Angry birds costume pattern

Just in time for Halloween- An Angry Bird costume making tutorial!

I have had a few requests for a tutorial and pattern for the angry birds costumes I made for my friends at the start of the year. I am going to attempt to put the process down for making the red, black or blue bird (basically, the round shaped birds) in as much detail as I can remember. If you've chosen one of the others, the patterns can be adapted for whatever shape you like.

Here are some pics of the finished birds for reference:


I have included some pics in the tute, but since I didn't photograph each step as I went, I've instead tried to describe each step carefully.

*disclaimer* I am not a professional- this tutorial outlines my novice steps to get there.

Please read through all the instructions before starting. Hope it helps!

Materials:
  • Butchers paper/newspaper, pencil and string.
  • polyester, or similar stretchy fabric (but not jersey- too stretchy) in desired colour. Metres/Yards will depend on size of wearer. You'll need enough for the front and back of the costume
  • small amount of white fabric for belly (grey for black bird) choose something snuggly
  • muslin or light white fabric for lining, for front piece of costume only.
  • felt in white, black and yellow (add blue/purple for black angy bird)
  • vlisofix/heat and bond or spray glue if you're game (for attaching the face)
  • light poly fill (toy stuffing). LOTS (1-2 bags per costume)
  • sewing machine and thread
  • 8 hours of your time. :) (if you're a novice! ha)

Step one: measure your Angry Bird

Take a measurement of your angry bird from the top of the head to just below the bottom, or desired length of costume. Add 6-8 inches for room above the head. This measurement is the diameter of the circle shape for your bird pattern.


Step two: draw your pattern outline

Take a large piece of butchers paper or tape pieces of newspaper together.It will need to be big enough to draw a circle with the diameter you just worked out in step 1.
To draw the circle pattern as accurately as we can (on a big scale) we are going to make a compass using a long piece of string and a pencil.
Tie your string or piece of ribbon to the pencil, close to the lead. 
Take your measurement (diameter) and halve it (radius). Cut your piece of string to the length of the radius.
You are ready to draw your circle!
Draw a dot somewhere in the middle of your butchers paper. Place the loose end of the string over the dot and ask a friend to place their finger over it and hold it down carefully.
Take the pencil and stretch the string so it is taut. Put pencil to paper and carefully draw a circle.
This is your basic shape, from here we will modify it to suit the characters.

Step 3: sketch some details onto your pattern

Shape the head:
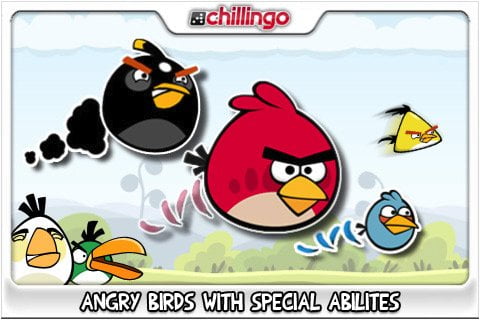
To give the head some shape, sketch some hair and taper the top part of the circle so it doesn't look completely round on top. Use this picture of the Angry Birds team to help you get some ideas:


Provide arm and face holes:
Next we need to draw some holes for the wearer's face and arms. Have a look at this picture to see how these holes work in action:


Use a cereal bowl to sketch a hole for the costume wearer's face and draw it on your pattern towards the top of the costume.

Draw two long vertical rectangles for the arm holes. The arms will be more at the angry bird's hip level as they come out in front. To check, hold the pattern up to the wearer and line up suitable face and arm holes. Draw in.


Draw tummy panel:
Sketch in the tummy panel using a curved line.

Draw the face:
Sketch the face onto the pattern. This will help you work out the scale. Draw eyes, a beak and angry looking eyebrows. If you're making the black bird, you'll need a piece on the head for the yellow 'spark.'

Trace the face pieces onto a separate piece of paper to use as a pattern. If you would like your face pieces to have a black outline (like the cartoon drawings of the Angry Birds), cut out the eye and beak pieces and draw new pattern pieces a little bigger for the black outline. Here's a pic of the finished face pieces to give you an idea.


Your pattern is now ready to use!

Step 4: Cut face pieces from felt

Pin your face pattern pieces to your chosen felt colours. Cut out carefully. If you've chosen to include the black outline, you can cut a hole in the eye pieces to create 'eyeballs' when you place the eye piece over the black outline piece. Fuse these pieces together with fusible webb for ease of application to the costume front later.
Repeat for the beak pieces.

Step 5: pin pattern pieces to costume fabric

To give you an idea of how the costume works, it's basically a pillow form on the front with a piece of fabric that goes over the back. Keep this in mind when you cut out your fabric.This is how I did it to save time and energy, but you can use another method that suits you:

Cut your piece of polyester fabric into two pieces for the front and back of costume
Lay your piece of muslin/cotton (for the lining) on the floor, wrong side up (though it doesn't matter as no one will see it)
Lay your front piece of polyester on top, right side up (bear with me)
Lay your back piece on top, right side down.
Place your pattern on top, right side up. Pin through all three layers of fabric all around the pattern. Cut out.
Unpin the pattern and three layers, setting aside the back piece of the costume.
Mark the arm and face holes, the tummy panel and the location of the face pieces onto your front and lining pieces using chalk or your prefered method.

Cut the tummy panel from your pattern (or trace onto new butcher's paper) and pin to your white snuggly belly fabric (or grey if you're making the black bird). Cut out. 

Step 6: sew tummy and face to front piece

Sew the tummy panel onto the front of the costume. To do this, I folded the fabric of the curved edges under 1/2 an inch and topstitched around the whole thing, enclosing the raw edges of the front piece where they lined up with the belly at the same time. This involved guesswork so I'm sure you can figure this part out/do it neater than I did!

Using fusible webb, iron your felt face pieces onto the front of the costume. Use the pictures above to work out the positioning. Iron on the felt for hair piece if necessary (for the bomb's spark)
Here's the face and stomach parts on my costume. (ignore the face and arm holes, we'll do that next).


Step 7: Create holes for arms and face and stitch front piece to lining:

We are going to join the front piece to lining by stitching the face and arm holes together first- right sides out (it will make sense in a bit.)

Here's how I did it:
Take your front piece and find the circle you have drawn for the face. Pierce a hole in the centre of the circle and cut slits from the centre, like you're cutting a pie. Stop each slit a little before the edge of the circle.
Repeat with the lining piece. (NB: to make this a little easier, I fused a piece of interfacing to the circles before cutting the slits. It made it stiffer and easier to work with).

Turn slits on the both pieces to the inside of the costume and press. Line up the circles and pin together around the circle, catching all raw edges in between the layers as neatly as possible.
Top stitch close to the edge, enclosing the 'flaps' you have cut. I Hope that isn't too confusing - I can't explain it any other way and there wasn't anything online for this method that I could find.

Repeat this process with the rectangle arm holes but make the slits like triangles and trapezoids (google it) and stitch together in the same way.

If you'd like to try an alternative method for making the holes, one of my readers Gloria emailed this suggestion to me:

" I put the face (red fabric) and lining (white fabric) tog; sewing on the right side of face - I place a piece of white fabric, and a piece of fusible interfacing (sticky side up).  Then, I sewed the lines of the holes, cut inside fabric, graded seams, and then turned the facings under; ironed the sticky side down, then used stitch whitchery (http://sewing.about.com/od/fusibles/ss/fusibleoptions.htm) to stick down the facing."

Here's a pic of Gloria's method:


I hope one of these methods works for you. Thanks for your suggestion Gloria!

After stitching the holes, stitch the front piece and lining together around the perimeter of the costume (still right sides out). Make sure you leave a gap for stuffing at the bottom. Make sure you can get your arm through the hole as you'll need to get the stuffing into the top of the costume easily. NB: don't worry that you can see this stitching, these stitches will be hidden when you sew the front and back pieces together in a minute.

Step 8: Stitch front piece and back piece together:

Sew the front piece to the back piece right sides together all around the perimeter, making sure you leave a big enough gap at the bottom between the front piece and the back piece to put it on easily.

Make sure your seam allowance is wider than the one you used for sewing the front piece and lining together so you can hide these stiches in the seam.
Turn your costume right side out and press the seam nicely.
Turn under raw edge of back piece at the bottom of the costume and top stitch to make it look neat. 


Step 9: Fill your costume
 
Stuff your front piece with polyfill, using small pieces at a time to avoid lumps. Be careful not to overfill it as it will be very heavy and hot! Slip stitch the gap closed.
 
Step 10: put on your costume and crash into pigs, walls and ice.


Yay!


Gloria sent through a lovely pic of her two Angry Birds. Here they are for you to enjoy:


I hope these instructions have been helpful for you. Please send me some pictures if you make costumes using these instructions as I'd love to see them.


Happy Halloween!

xx


Todays Creative Blog
Related Posts Plugin for WordPress, Blogger...