
I have lots of small bits of favourite fabric lying around (some call it hoarding...) so these coin purses are a way I can use them up. They also make cute little gifts.
I made my own pattern for this so naturally I was quite surprised when it turned out ok! This is quite a long tutorial with lots of pictures, as these were the kind that really helped me when I was learning. Any feedback on the instructions are welcome!
Here is a pic of the finished purse.

Materials needed:
- feature fabric
- purse top fabric
- lining fabric
- iron on interfacing (optional, depending on fabric thickness)
- zipper (any length, you'll be cutting it anyway)
- paper, pencil and ruler
- pins, machine, coordinating thread.
Seam allowance: about 1cm (about 2/5ths ") I just use the edge of my foot most of the time. I don't think it makes a huge difference in this project.
Step 1: make your pattern (super easy)
For the top of the purse, draw a rectangle 3.5cm (1.5") by 12.5cm (5")
For the purse body, draw a rectangle 7.5cm (3") by 15cm (6"). Round off the bottom corners with a gentle curve.
for the purse lining, draw a squarish shape, 10cm (4") by 12.5cm (5")
Your pattern should look like this (minus the shadow of my cat Claude's face) Apologies for the dodgy picture!
 | |
| make your pattern |
Pin your pattern pieces to your chosen fabrics and cut out two of each for the front and back of the purse. I find it easiest to fold the fabric in half with right sides together and cut the two pieces out at once using a rotary cutter. it means that the two pieces should match up properly when you're sewing them together later.
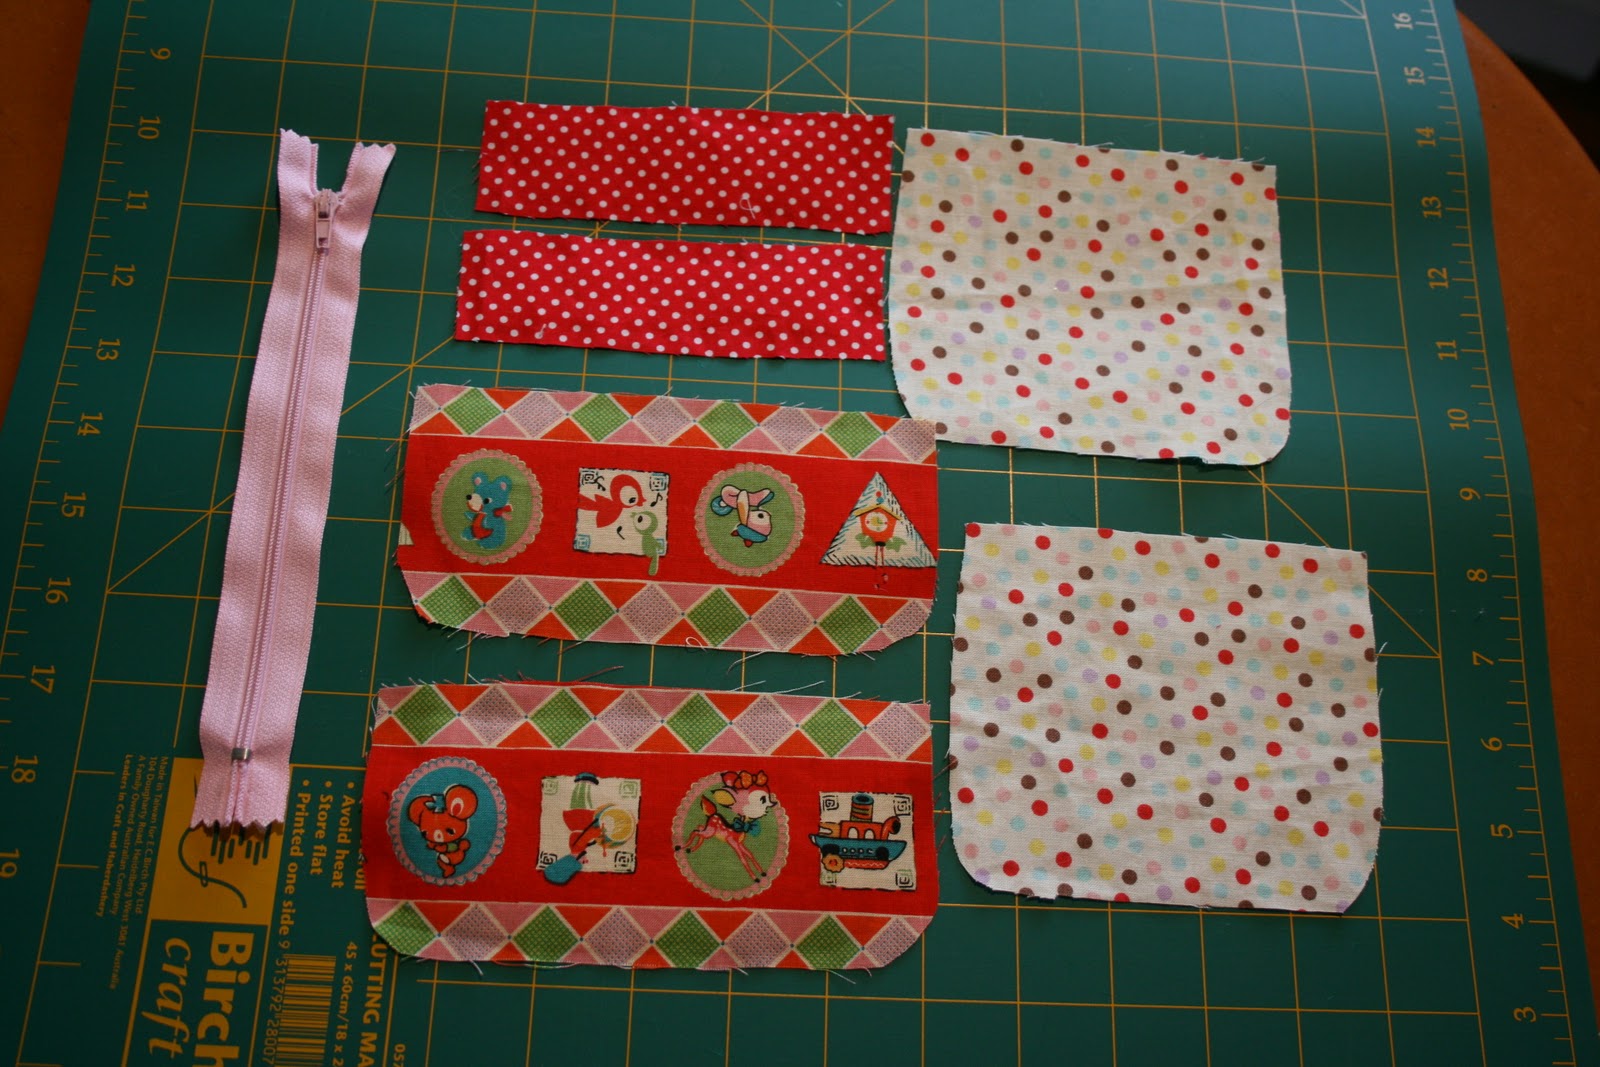 | |
| cut fabric & zipper |
step 3: add interfacing (optional)
At this point, I used some iron on interfacing on the purse top and body to give my purse some extra stability. These fabrics are fairly light cotton and can be a bit floppy, but if you're using heavier fabric like linen or denim you might not need it. I make the interfacing pieces smaller than the fabric pieces so it doesn't add bulk to your seams.
 |
| add interfacing if necessary |
Take your purse body pieces and some pins. You'll notice the purse body is a little longer in length than the purse top. This is to allow for the folds you make in the fabric to create the cute little pleats. After you've made your pleats, these pieces should be the same in length, so keep the pleats pretty small.
To make a pleat, you basically fold the fabric on itself and pin it in place wherever you want to pleat to sit. I have 3 pleats in my purse, all going in the same direction. Experiment with it until you're happy.
Repeat with the other piece.
 |
| make 3 pleats, pin in place |
To hold the pleats in place, give them a little press with your iron and stitch across the top, using a small seam allowance so you don't see the stitches later on. Press again.
 |
| stitch across the top of the pleats to hold in place |
Pin the purse top to the purse body and stitch in place. Press flat.
 |

Step 6: attach fabric to the zipper
Cut your zipper to a length a little longer than the length of the purse lining. Cut it from the end with the zipper pull, but be careful not to let the zipper pull come off the end as it's a pain to get back on. (Yes, it came off during this project and I had to pry off the metal thing at the bottom to get it back on again) It would be sensible to put a pin in the end to make sure it doesn't happen. Feel free to learn from my stupidity. :)
Lay one of your lining pieces face up on the table. Lay the zipper on top, also right side up. the zipper ends should hang over each end of the fabric as pictured below. Don't pin yet.

Lay one of your body pieces face down on top of the zipper and lining piece.

Line up the fabric and zipper tab carefully at the top and pin into place along the length. Don't worry if the curved bottom edges of the body and lining don't match up as you won't be sewing these bits together anyway.
In the picture below, I have pulled back the main body pieces so you can see the zipper sandwiched between the lining and the body.
 |
| zipper sandwiched between lining and body fabric |
Tip: This has made sewing zippers heaps easier for me: Start at the end of the zip with the metal closure and the zip pulled up completely. When you have sewn about 3/4 of the distance, stop with the needle in the fabric, lift the zipper foot off the fabric (the needle will hold it in place) find the zipper pull and carefully slide it up to the other end. this allows you to do the other end of the zipper easily without the pesky pull being in the way. Genius.
After sewing, press the fabric so it sits flat against the zipper. You can top stitch too if you like. In this picture, i haven't pressed it or top stitched it which is why it looks a bit dodgy.

Repeat this whole process again with the other lining piece and body piece:
Lay the lining piece face up, put the zipper on top, right side up. Line it up properly. This pic is just to highlight what it would look like underneath.

Lay the other body piece on top, pin into place. Both of your outer body pieces should be right sides together as you can see below.

Here's what you'll have.
 |
| outside pieces |
 |
| lining pieces |
Yay! We're almost there! The scary zipper part is over. woo!
Important: before pinning, pull the zipper across halfway or you won't be able to turn it out the right way.
So now we need to sew the two body pieces and the two lining pieces together.
Pin the two body pieces right sides together.
Pin the two lining pieces right sides together, leaving a gap of about 4 or 5 cm (2") in the bottom so we can pull it through the right way later.
In the picture below, the gap is marked with a bobby pin.
In this picture you can see the zipper ends poking out of each end. When you put the lining and body pieces together, the zipper will need to be adjusted so the tabs are sitting flat on top of each other, facing the same direction (if that makes sense). I find it makes it easier to sew them down and looks neater when you turn it the right way.
 |
| pin around the whole thing leaving a gap in the lining to pull it all through |
A (easiest)
Starting next to the gap you have left in the lining, stitch all the way around the perimeter of the purse, carefully going over the zipper ends, and stopping at the gap in the lining at the other end.
B (still easy but probably not explained very well...)
First I sew around the body. Starting in the middle of the bottom, i work my way around to one of the zipper ends. I go over the zipper and stop just beyond it on the lining side. Then, I flip the purse over and repeat on the other side of the body piece.
- Repeat this process on the lining side, extending the stitches to just beyond the zipper tab on the body piece. this way, you have sewn over the zipper end twice which makes it stronger.
Method B also allows you to change thread colour more easily as there is a gap in your sewing when you change sides, but either method would work well.
Note: Take care when you go over the zipper end with the metal fastener. it will be close to the seam allowance so take care you don't hit it with your machine needle.
 |
| sew around the perimeter of the purse |
Now this is the fun part. Put your hand (or fingers if you made the gap too small eep!) into the gap in the lining and pull the body of the purse through the opening.


Slipstich closed the gap in the lining and press the whole thing flat.
Hooray! You've made a cute little purse for your coins, lip gloss, minties, Chiuaua..... maybe not.
 |
| front |
 |
| back |
Now go and make one for your favourite friend! Yay!
X


That is a great tutorial, and an awesome coin purse!
ReplyDeletehttp://mcgreenexperience.blogspot.com/
I LOVE IT! I am your newest follower! Come follow me?
ReplyDelete